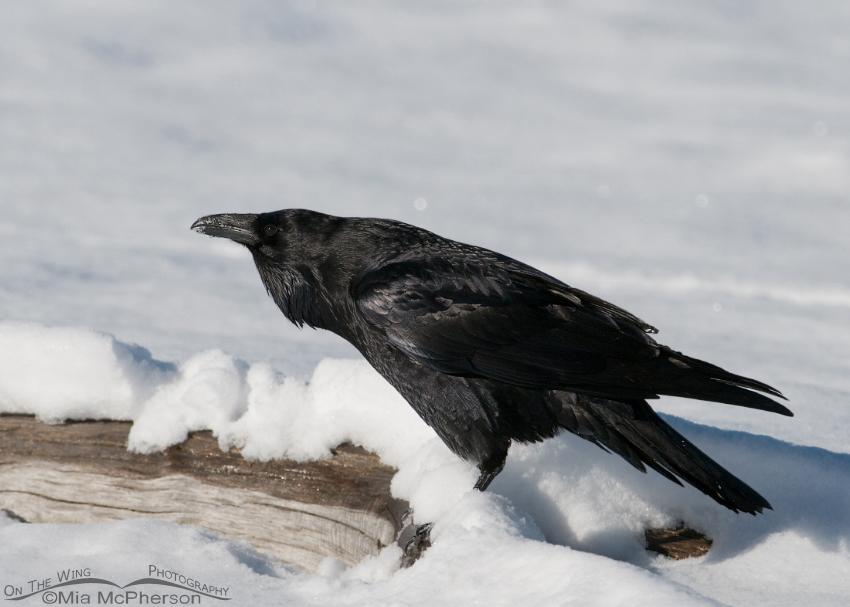
Common Raven in the snow – An exposure problem

Common Raven in the snow - Original

Calling Common Raven in snow original - Nikon D300, f6.3, 1/4000, ISO 400, 0.0 EV, Nikkor 200-400mm VR with 1.4x TC at 285mm, natural light, not baited or called in

Photographing dark birds such as this Common Raven is a challenge and knowing how to expose properly as well as getting the right angle of light is critical in producing a quality image.
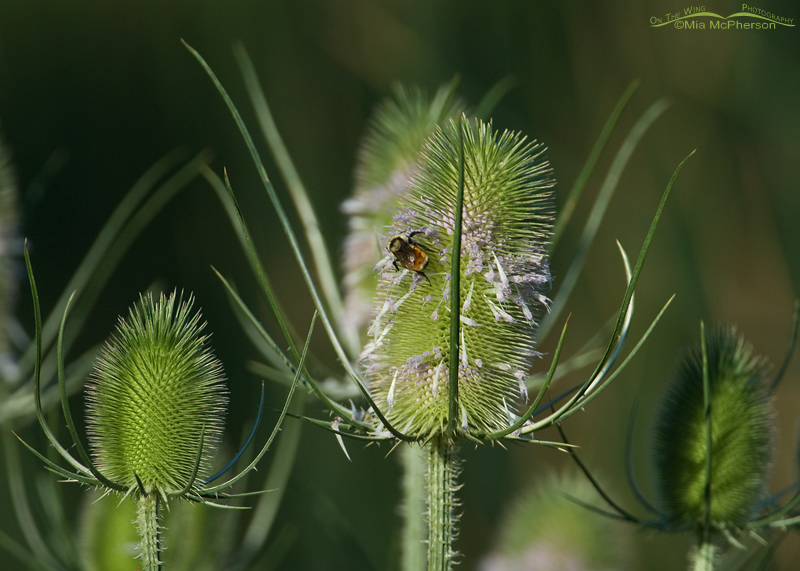
 I have posted before about the importance of honest self critique and that will discussed in this post too. The exposure of this very dark bird is even more difficult because of the high contrast between the dark raven and the bright white snow.

The Common Raven image above is not properly exposed, in fact it stinks. The blacks are blocked up and very little feather detail is evident even though the bird is sharp. This image belongs in my delete bin but it can be used as an example of honest self critique. The expanded view area above the bird shows the area outlined in red at 200% and except for the upper left hand corner of the expanded view I barely see any detail.

I brought this image into Photoshop, cropped it slightly then masked the bird and sharpened it, no other adjustments were made.

poorlyThis Photoshop histogram shows how poorly exposed this image is, the tall column of blacks on the edge of the left side shows how badly the blacks are blocked up. The histograms in our cameras can show us poor exposures in the field and by using the histogram exposure compensations adjustments can be made.

By using my skills of self critique I can say there were two things that could have made this image a keeper, 1) a better exposure and 2) a better light angle on the birds itself.

Could this image be saved in post processing?

Common Raven in the snow - lightened

Calling Common Raven in snow lightened – Nikon D300, f6.3, 1/4000, ISO 400, 0.0 EV, Nikkor 200-400mm VR with 1.4x TC at 285mm, natural light, not baited or called in

This is the same image processed differently. I brought the file into Photoshop and increased the exposure by +.15, used the fill light slider and bumped it up to +25, I also used the tone curve slider for the blacks & shadows and raised them by +40 to raise the exposure of the darks within the image. I masked the bird and sharpened it using the same procedure as the top image.

after-ps-adjustments

This is the Photoshop histogram after post processing in Photoshop, the blacks are no longer blocked up towards the left edge of the histogram. Looking at the expanded view at 200% does show feather detail and areas of the Raven don’t look like a black featureless subject.

The problem? By increasing the exposure of this Raven in post processing I have introduced “noise” and it is right on the edge of “color noise”. I find this amount of noise unacceptable in my images. In both the expanded view and normal view I can see and detect that noise as blocky areas that just do not appear natural and that ruins this image for me and because of honest self critique this file is delete bin bound. The quality of this image is not acceptable to me even after post processing.

Well-meaning friends, relatives and non-photographers might think that this is a good image and say “Wow” or “great image” but after spending years honing my skills and time spent critiquing myself, I know it isn’t “great”.

I use Noise Reduction software sparingly, I very rarely ever apply it to my subject because it can cause the subject to look unnatural and unrealistic. Used excessively Noise Reduction software can give the feathers a melted appearance and it also ruins the fine details I like to see in my images. Granted, I am not very skilled at noise reduction and I feel that by getting my exposure correct in the field there is very little need for me to use it or become proficient at it.

 Calling Common Raven in snow

Calling Common Raven in snow – Nikon D300, f6.3, 1/2500, ISO 400, +0.3 EV, Nikkor 200-400mm VR with 1.4x TC at 285mm, natural light, not baited or called in

After looking at my cameras histogram I made a slight adjustment to my exposure compensation (EV) of +0.3 which brought out more detail in the black plumage and while this exposure isn’t perfect I am pleased with it. This image was taken just four frames after the top image. The Raven had moved slightly and that improved the angle of light falling on the bird too. I could have increased the exposure another step but in doing so I would have risked blowing out the whites of the snow.  If I had blown out the snow I could have reduced the exposure in post processing but to be honest I would rather keep all my post processing adjustments to a minimum.

Ideally I would have liked to have started photographing the Common Raven about 10 feet back towards the west for a better light angle but sometimes other traffic can get in the way of doing that after the first stop. Just another of the frustrations bird photographers can face.

I know I am critical of my own images but every time I do an honest self critique I learn about improving my photography and that is a good thing.

Mia

Facebook Twitter

Playing with Light – Teasels

This morning I had hoped to see and photograph a Green Heron that was reported to be just a few miles from where I live, Green Herons aren’t common here so it would have been fun to photograph it. While I was waiting I took images of other birds in the area but there weren’t all that many that were close so I looked around for more subjects.

Teasel - Frontal light - light background

Teasel – Frontal light – light background – Nikon D200, tripod mounted, f14, 1/100, ISO 400, +0.7 EV, Nikkor 200-400mm VR with 1.4x TC at 400mm, natural light

Large groups of Teasels (Dipsacus fullonum); an introduced “weed”, caught my eye in the early morning light and rather than just wait around for the Green Heron to show up I started focusing my attention on the plants. I know that they are weeds, I know that many people hate them but I find their shape, texture and structure interesting and I decided to play with the light to see what results I could achieve.

The image above had frontal light plus a light-colored background. I set my aperture at f14 hoping to get the two closest Teasels sharply in focus, the depth of field didn’t quite work because the smaller teasel is some what soft.  I probably should have gone with f18 but I like the resulting image.

Teasel - Frontal light - dark background

Teasel – Frontal light – dark background – Nikon D200, tripod mounted, f6.3, 1/750, ISO 400, +0.7 EV, Nikkor 200-400mm VR with 1.4x TC at 400mm, natural light

Then I looked around and selected a group of Teasels that had a darker background with frontal light and happened to find one with a bee on it. Since the two main Teasels were about in the same plane of focus I selected an aperture of f6.3 which resulted in both of them being in focus. I quite liked the darker background in these frames.

Teasel - Frontal light - very dark background

Teasel – Frontal light – very dark background

This Teasel then drew my attention, it leaned away from the main group and thus is was easy to isolate plus it had a very dark background with frontal light which appealed to me so I moved my tripod again. I really liked what I saw through my viewfinder.

Teasels - Back lit

Teasels – Back lit – Nikon D200, tripod mounted, f8, 1/320, ISO 400, -0.3 EV, Nikkor 200-400mm VR with 1.4x TC at 400mm, natural light

I know that many photographers are taught to shoot with the light behind you and that many of them wouldn’t consider taking back lit images but I kind of enjoy the challenges difficult lighting conditions and the rather dramatic results that can be obtained. I also will; whenever the mood strikes me, ignore the advice of “shoot with the light over your shoulder” and just do what I want to do.

This image is a bit on the busy side but I enjoy the textures of the Teasels, the bright bristles along the stem and the specular highlights in the background caused by the rest of the bristles on the stems of the other plants.

Teasels - Back lit - dark background

Teasels – Back lit – dark background – Nikon D200, tripod mounted, f8, 1/320, ISO 400, -0.7 EV, Nikkor 200-400mm VR with 1.4x TC at 400mm, natural light

The Green Heron still hadn’t shown up so I kept photographing the Teasels, I searched out a group of back lit Teasels with a dark background. The back lit spiky flower heads and the whisker-like bristles along the stems seem to glow when the light is from the back. I really wanted to run my fingers over them to see what they felt like, I’m not sure why I didn’t. You can bet I will next time!

Teasels - Back lit - bright background

Teasels – Back lit – bright background – Nikon D200, tripod mounted, f8, 1/350, ISO 400, -0.7 EV, Nikkor 200-400mm VR with 1.4x TC at 400mm, natural light

My eyes fell on this clump of back lit Teasels with a brighter colored background and I knew I just had to move my tripod over to them to see what I could create, I’m glad that I did. I like the mood the brighter background lent to this image and how it accentuated the egg-shaped flower cones.

The Green Heron never did show up this morning and although I wish that it had, I still had fun… Playing with Light!

Mia
OnTheWingPhotography

Facebook Twitter